Crossing the line at 195.7mph in Oct 2009 was not good enough. As our first time competing at the famous Texas Mile, we were happy, but not satisfied. With the next event on March 26, this is our story of how in 20 days we will prep our car to break 200 mph. This brief intro has what some of our changes will be and starting March 6th, we will chronicle our updates with pictures, video, and more including live coverage of the event. Make sure to follow our Twitter Account too for updates we will only post there.
So the Story Starts…
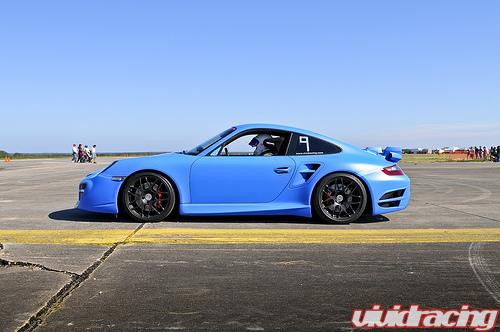
With about 800hp to the crank, we were sure we could be 200mph and would be coming home superstars. We fell short of that mark by 4mph due to a couple of reasons that we will remedy shortly. The first major change will be aerodynamics. There is an obvious reason Porsche spends millions on designing their cars the way they do. Just cause it looks cool, does not mean it is functional. For most of us, that does not matter as we almost never get over 100mph or at most 150mph for fun. But when you are chugging down the strip trying to break records, aerodynamics means everything. Although the Vorsteiner carbon fiber front and rear bumpers are aethetically pleasing, they are not doing the trick. The front bumper has large side radiator pockets that catch air slowing it down. When running these blocked off, improvements were seen, but cooling abilities lessen. As well, the rear bumper with the straight pipes acted like a parachute catching air. The rear bumper could be modified, but for the sake of our goals, we are going back to stock. The front bumper will have the Agency Power OEM like front lip spoiler on it and the rear bumper will get a complete custom aluminum rear diffuser from the plastic undertray back. This will help eliminate any air flow issues we might have had before. Like our previous attempts, we will remove the carbon wing blade and leave trunk lid with GT2 style inlets to help force air into the engine bay for cooling.
Once the car is 90% back to aerodynamic spec (less decklid and side skirts), we will then make a couple of changes to the suspension, ride height, and alignment. We feel that obviously the lower the car, the less lift it will produce and the more stability it will obtain. Not only change the ride height, we will change the alignment to be at a 0 degree camber to reduce any tire drag/scrubbing caused from an aggressive street alignment. We will lower the car about another 1/4inch and swap the coilovers out to the KW Variant 3 system. The KW V3 will give us the ability to adjust compression and rebound seperately to help the ride at higher speeds. The ability to fine tune the adjustments over 1 single dampening setup can really affect how the car comes off the line as well. The KW shock absorber will also perform much better with our height adjustment because of how the shock is valved. Both Agency Power sway bars will be set to the stiffest position to reduce any floating affect which can happen with wide tire cars tracking.

A couple of the biggest changes to the car will be tuning and power related. After filming our Greddy EBC, we noticed that it would spike to 1.5bar and trim down holding constant at around 1.33bar. This was completely because of user error with the warning feature. From recent posts, it seems that the stock engine on full race gas can handle 1.6-1.7 bar of boost. This is putting some strain on the stock motor and head gasket most likely. But with the addition of the AEM water/meth system, this will reduce detonation. We will spend a good solid couple of days datalogging the car on our Mustang Dyno to see the affects of these boost levels with and without the AEM and NX NTercooler sprayer. When we ran in Oct 2009, the car had a mix of 100 and 109 because of fuel availability. This time around, pure VP MS109!
[tube]https://www.youtube.com/watch?v=izwVVDvFH7Q&feature=player_embedded[/tube]
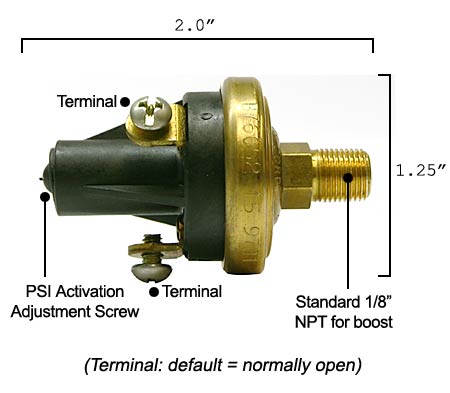
Another function of our testing will be with the NTercooler spray kit from NX. Its current setup was manual activation with a switch by the foot rest to spray and cool the intercoolers before launch. Obviously as the car is put to the test down the straight, the temps will climb. We will be rigging up the system with a Hobbs Switch to continually spray everytime the car hits a set boost level. Focusing on lower temps and efficiency, we will also be ceramic coating the headers which reach very high EGTs under these conditions.
With the power and stance setup and surely to push us those extra mph’s, we are going to go the extra step and reduce the rotational mass further from our Brembo rotor upgrade with a set of 19×8.5 and 19×11 HRE C93. The HRE Competition series wheel features titanium hardware, honed out spokes, and a 3pc design. This particular thin spoke style will have a step lip and weigh about 18lbs on the front and 20lbs on the rear saving us 20% of rotational weight over the HRE monoblock or ADV1 wheels. We opted for a more aggressive offset and deeper rear lip for that flush look.
 [/url]
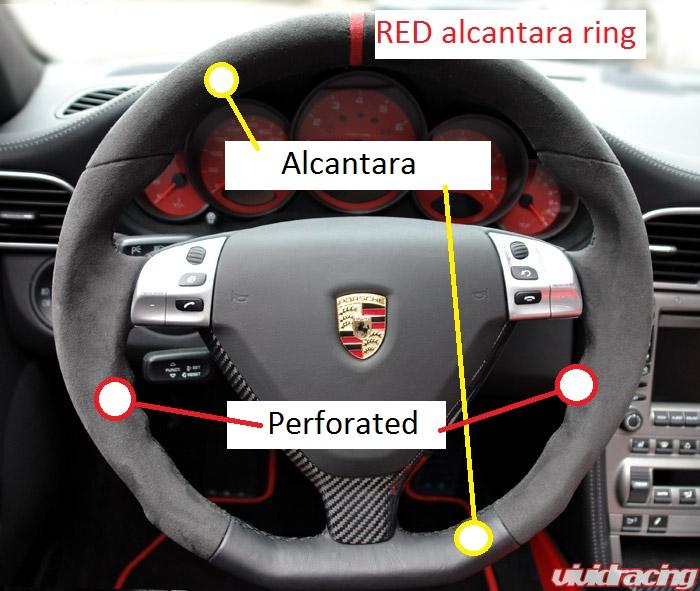
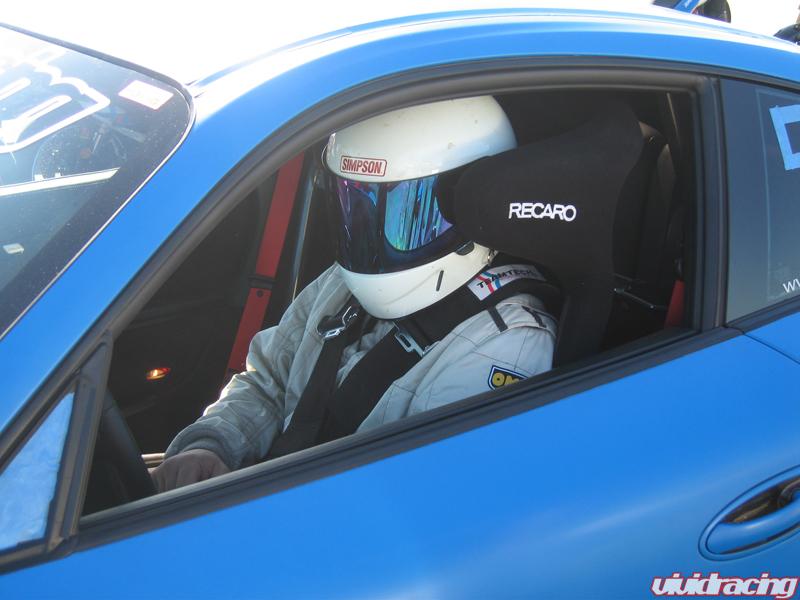
Once again we will be switching out the interior to lighten it up by removing the passenger seat and replacing the driver seat with a Recaro. We will also be removing the BOSE subwoofer and then working with our new friends at DCT Motorsports by adding a new custom made steering wheel. As pictured below, the steering wheel will feature a red 12 0’clock stripe, alcantara upper and lower with a flat bottom, perforated leather, and a carbon fiber trim piece under the airbag. This is all for style points 🙂
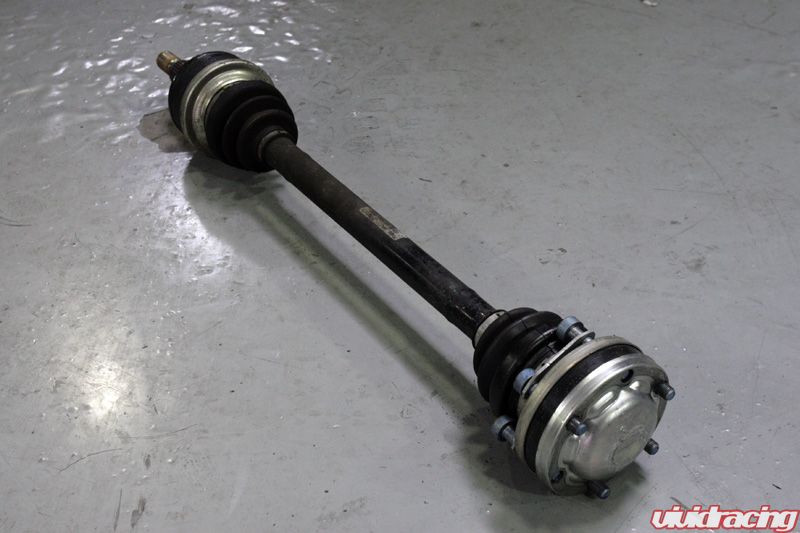
Before the car goes on the dyno for testing, we will also be updating the rear driveshafts because of the play in them from the horsepower. We will be using the DriftShaft Shop 800HP axles to deliver the power to the wheels.
Stay tuned for pics, video, and updates here at Project 997TT – Vivid Racing

Good luck guys!!!!
I would like to go 200mph.
This is such a cool project. I’m sure you guys will kill it!
I’ll tell you what you need….
You need more b000000000ssssssstttttttttttttttt.
Just got the HRE C93 wheels in. 19×8.5 and 19×11. Fronts weigh 19.5lbs and rear 20.5lbs. Compared to the HRE Monoblock and ADV1, this saves about 3lbs front and 5lbs rear rotational weight.
Just did some dyno testing…
Video is here
[tube]https://www.youtube.com/watch?v=9Zw50kr3tuk[/tube]
20 Days is coming down fast. I think we are at 13 now! Got the rear end apart 🙂
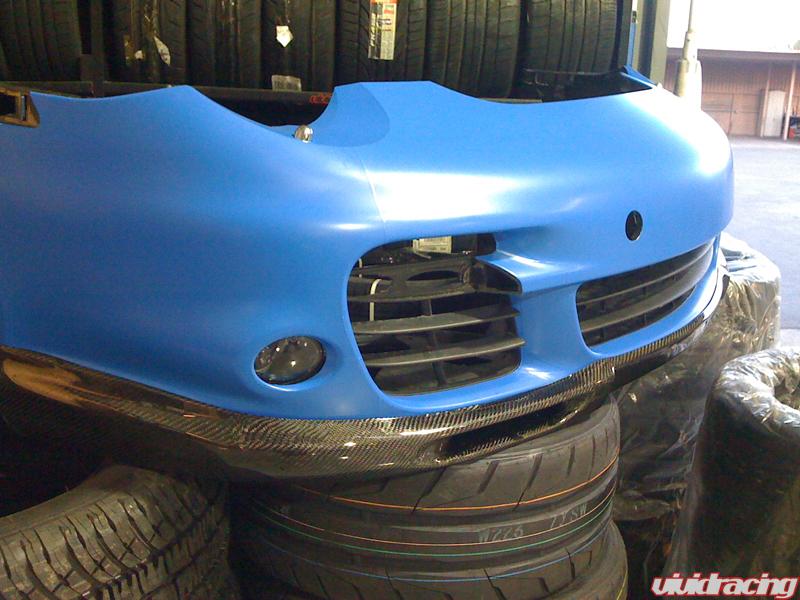
Waiting for new 1000HP axles from DriveShaft Shop. Installed the Hobbs switch for the NX sprayers. Got the front bumper on. Need to get the new coilovers and alignment done. So we are trucking along!
Stock axles have a ton of play now from all the power. Instead of waiting for it to snap, replace it ahead of time!
So we are hammering through the mods and getting the KW coilovers installed along with the stock bumper, straight pipes, and new axles. The KW coilovers are pretty incredible. Just for a side note on these about using the stock strut tops on the front of the Porsche. We were wondering why there is no bearing for the stock strut top to go into the zinc plated sleeve… well Klaus from Germany called us and KW designs the coilovers so the shock rotations is done with a built in bearing on the bottom spring perch. So when the shock is fixed in the car, the upper mount does not turn like on conventional coilovers that have built in upper mounts. Here are some quick pics!
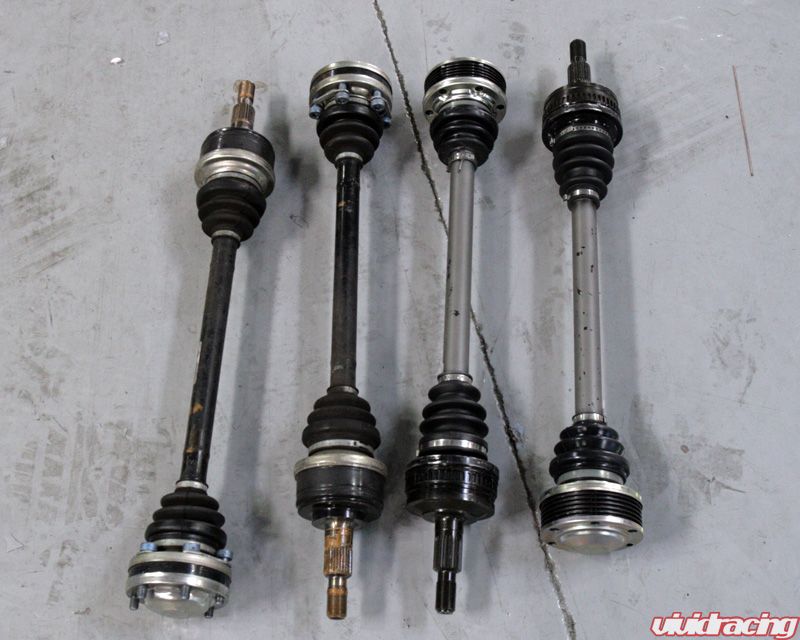
Driveshaft Shop axles just arrived via UPS and are ready to go in. The 1000HP driveshafts feature chromoly 108mm inner and outer CV, with exclusive chromoly cage/race set, and a 300M bolt-on outer stub to fit the factory hub. The center bars are chromoly and 36 splines, upgraded from the factory 28 spline units.
Lets hope they hold up!
OEM on the left, DSS on the right
Live video of build – https://www.vividracing.com/catalog/pages.php?pID=88
Got the Hobbs switched hooked up. Now when we hit say 5lbs of boost, the Nitrous is sprayed on our intercoolers. We can do this manual or automatic.
We also got our customer under tray built since with the straight pipes, the rear bumper acts like a giant parachute. This is all aluminum hand built here.
More updates tomorrow!

So we got the KW Coilovers on and doing the drag specific alignment here today. Before I get into that story, I wanted to share pics of the finished diffuser. I think we might make this in carbon down the road. Our fab guys are pretty good 🙂 Pretty sick!
One of the major changes we did was the suspension. The reason for this was some function, some quality, and most importantly… safety. KW Coilovers have been a bench mark in racing worldwide. As 1 part of a winning team, Team Manthey Racing has won the 24hours of Nurburgring 5 times on KW coilovers. After Vivid Racing got a chance to visit the KW facility in Germany, our view on how coilovers SHOULD be made has changed tremendously. Besides having a meticulous assembly line down to bar coded fluid levels, KW designs all their coilovers on a 7post Formula 1 shock dyno. Once they dial in the product, they road test it. With improved handling and better then stock ride, KW achieves a level of suspension that is amazing for street and track cars.
Having used almost all types of coilovers from Japanese brands such as Tein, JIC, Cusco to German brands of Bilstein and H&R, Vivid Racing has driven on many different suspension systems. What we liked about KW was the independent rebound and compression. Most suspension systems have 1 dampening adjustment that can go different levels. But with seperate adjustments, you can really dial in the performance of the shock. Like a motocross bike, when you have the rebound set fast, the bike will buck. Or if you have the compression to stiff, it is hard to compress. These work the same which allows you to fine to the car to be able to deliver better traction upon acceleration or better absorbtion of bumps in street driving. But like any suspension, alignment is key and so is the balance of the sway bars with over and understeer.
For street driving, KW recommends setting the front to a ride height from center cap to fender edge of 345mm and the rear to 355mm. Because of the Texas Mile, we had the car slightly lower. For track, you generally want more camber in the rear to help in steering. A good track setup would be -1.5 degrees up front and -2 degrees in the rear. Rear toe should be inwards at about .15. However again because of topspeed, we are setting the rear camber to 0 and the rear toe to close to 0. The front will be close to stock.
Installation of KW is like any other coilover. KW does use the stock strut tops or you can use a solid mount from Mode Inc. 1 thing that we did not realize after frantic phone calls is that KW moves the rotation of the shock from the top at the strut top to their own built in bearing at the bottom of the spring. The front coilovers come with new sway bar links or you can run the Agency Power ones that connect to the pinch bolt of the wheel carrier. The rears retain the stock ones. Our 997TT runs the Agency Power front and rear sway bars. Usually we have the rear set on stiff (inner most hole) and the front on the soft setting. On an AWD car more oversteer helps in turn in and handling on a race track. For the Texas Mile we opted to put both on the middle holes for neutral stability. You can see the improvement over stock from the Agency Power Sway Bars Here.
The rear of the coilovers requires the removal of the BOSE system to access the top of the struts which can be a bit of a pain. However once they are bolted in, you are really done there. The KW does not use the PASM system. You must disable the PASM system as read here. Bilstein has the patent to the PASM system so you will only find this on the PSS10 coilovers. Though you may enjoy the push of a button to go from soft to stiff, a well tuned KW suspension will out handle and be more comfortable. Comparing the KW Coilovers to other suspension system, you will notice a thicker shock shaft, better mounting brackets, and a engineered system that you will feel comfortable on in any driving condition.
Vivid Racing is a key partner with KW Suspension and we hope you enjoy the pictures of our installation. We will also have a video put together soon too which will be on our YouTube Channel Here. You can view all our KW Coilover Products Here.
You can view all installation pictures on our Porsche 997TT Gallery here.
Secret switches 🙂
Go Go gadget cigarette lighter!
Now here is something that will make us uber fast 🙂 Vivid Racing hooked up with DCT Motorsports to equip our 997TT for the Texas Mile a new flat bottom more ergonomic steering wheel. DCT does these steering wheel conversions for many cars like the Lexus, Mercedes, BMW, as well as Porsche. They get steering wheel cores and convert them into artwork. For our daily driving steering wheel, we choose to have the position from 9 back to 3 all preforated leather which would last and breathe well. The top from 9 to 3 is alcantara with the red 12 o’clock racing strip like the GT3 done to match our factory red seat belts. The flat bottom was wrapped in carbon fiber with a glossy finish. The install was about 20mins and we simply swapped out our airbag and controls. Vivid Racing is adding these to our site, but check out DCT Motor Sports Carbon Fiber, Alcantara, wood-leather Sport steering wheels for Porsche Mercedes Benz BMW Audi Ferrari in the meantime!
Final photos! Thanks to our sponsors for the help and stay tuned to our twitter account the next couple days for video and live updates – Vivid Racing (vividracingcom) on Twitter
Everything looking good. I don’t see why you guys shouldn’t hit 200+.
206.2mph!!!!!!!!!!!!!
[tube]https://www.youtube.com/watch?v=Ejiw2LYR_AY[/tube]
Congrats guys.
Sweet, did you ride along during that?
Hell no 🙂
That’s no fun, you gotta experience what you helped create! BTW, pics of M5?
Finally got our KW Video done –
[tube]https://www.youtube.com/watch?v=PTQsS-ZtQdw[/tube]
Nice vid! That Texas Mile footage at the end is scary just watching it!